24/7 Emergency Services - Call (937) 203-0123 for Immediate Assistance!
Repair a Leaking Faucet in the Bathroom Step by Step
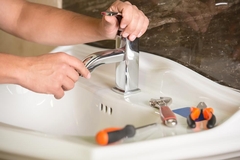
It's a typical tranquil morning in Dayton, OH, and the last thing you want to hear is the repetitive drip-drip-drip of a leaking faucet disturbing your peace. Many believe that fixing a leaking faucet requires calling in the heavyweights for emergency restoration in Dayton and its surrounding cities, but you might be surprised to find that you can handle this common issue yourself with a little guidance. Repairing a leaking faucet in the bathroom can be an accessible task, saving you time and money, not to mention reducing water waste significantly.
This step-by-step guide will walk you through the process of fixing a leaking faucet, transforming you into the handyman of your home, and helping you understand why leaks happen and how you can prevent them. You'll also learn when it might be time to call in professionals for more extensive repairs or issues. For now, let’s delve into the process, equipping you with the confidence and knowledge needed to tackle this common household problem.
Understanding the Basics of Your Bathroom Faucet
Before you dive into the practical steps of fixing the leak, it's essential to understand the basic components of a faucet. Knowing the anatomy of your bathroom faucet ensures you can accurately diagnose the problem and apply the appropriate solutions.
A typical bathroom faucet includes several key parts: the handle(s), the spout, the valve (located inside the faucet), and various washers and seals. The handles control the flow of water through the spout. The valve, often a ceramic disc or a ball, regulates water temperature and flow. Washers and seals are crucial as they prevent water from leaking out of the assembly.
Identifying the Type of Leak
Before embarking on the mission to repair a leaking faucet in the bathroom, one must first identify the source of the leak. Water can escape from the faucet in various ways, each indicating different potential issues.
- Spout Leak: If water is constantly dripping from the spout, the problem is usually the washers or the valve seat inside the faucet body.
- Handle Leak: Water leaking from the handle when the faucet is turned on suggests an issue with the O-ring or the seams on the valve stem.
- Base Leak: If water pools around the base of the faucet, the culprit might be a faulty gasket or loose mounting nuts beneath the sink.
Tools You'll Need
Before grabbing your toolbox, ensure you have the necessary tools ready to avoid interruptions during the repair process. Gathering these items beforehand provides a smooth workflow and expeditious repair, allowing you to tackle the task efficiently. Here’s a quick list of essentials you’ll likely need:
- Adjustable wrench
- Screwdriver set
- Penetrating oil (optional for stuck parts)
- Replacement parts (washers, O-rings)
- Plumber's tape
- Clean, dry cloths
- Small bowl (to hold small parts)
Steps to Repair a Leaking Faucet in the Bathroom
Now let's proceed with the actual repair process. Follow these steps to effectively repair a leaking faucet in the bathroom:
- Turn Off the Water Supply: This is critical to prevent flooding or water damage while you work. Identify the water shut-off valves, usually located under the sink, and turn them off by twisting them clockwise.
- Plug the Sink Drain: Use a sink plug or cloth to prevent any small parts, like screws or washers, from falling down the drain during disassembly.
- Remove the Faucet Handles: Depending on your faucet type, you may need to pry off a decorative cap or use a screwdriver to remove the handles, providing access to the underlying valve system.
- Extract the Valve or Cartridge: Use the wrench to unscrew the packing nut and remove the valve or cartridge from the faucet assembly. If parts are stuck, use a penetrating oil to loosen them gently.
- Inspect and Replace Damaged Parts: Examine the O-rings, washers, and the valve seat for wear and tear. Replace any damaged parts with new ones that match your faucet model.
- Reassemble the Faucet: Once all worn components are replaced, reassemble the faucet in the reverse order. Ensure that all parts are fitted tightly but not overly forcefully, as excessive tightening can lead to new issues.
- Test Your Repair: Slowly turn the water supply back on and test the faucet for any remaining leaks. Run the faucet for a few minutes to ensure everything is operating smoothly. If leaks persist, you might need to explore deeper issues or reach out to professionals for assistance.
Troubleshooting Common Faucet Issues
Despite following steps diligently, sometimes leaks remain due to underlying issues not immediately apparent. Here are common areas to check if your faucet is still leaking:
- Valve Seat and Spout Corrosion: Corrosion around these areas can lead to water dripping. In such cases, professional advice or replacement might be necessary.
- Incorrect Parts: Using incorrect or poor-quality replacement parts can lead to further leakage. Always use appropriate parts compatible with your faucet's make and model.
- Loose or Over-Tightened Parts: Ensuring parts are snugly fitted without being overly tightened is essential. Check each component, adjusting as needed to achieve a secure fit.
When to Contact a Professional
While basic faucet repairs are manageable, some situations demand expertise beyond DIY capabilities. Recognizing when it's time to consult with professionals saves time and can prevent complicated water damage.
For extensive water damage cleanup in Dayton and its surrounding cities, you might require more than standard leak repair. In such scenarios, engaging with Maximum Restoration could help mitigate issues and restore your bathroom efficiently. Their specialists can assess the damages, identify complex problems, and provide comprehensive solutions to restore normal function.
Benefits of Proactive Leak Prevention
Repairing a leaking faucet in the bathroom not only solves immediate issues but also embodies broader preventative maintenance practices. By addressing leaks promptly, you're contributing to overall household water conservation and cost efficiency on your water bills. Moreover, regular inspections and prompt repairs help maintain the faucet's functionality and longevity, reducing the frequency of replacements.
Implementing these preventive measures reduces the chances of larger, more costly plumbing repairs in the future. Make it a habit to regularly check all faucets and plumbing systems within your home for integrity and function.
Maximum Restoration: Your Partner in Plumbing and Beyond
Engaging experts like Maximum Restoration provides peace of mind, ensuring small leaks don't escalate into more significant issues. Their services, which extend beyond simple repairs, encompass tasks such as mold removal in the Xenia area and other detailed restorations, making them a comprehensive solution provider in the region.
Maximum Restoration is here to provide expert advice, efficient repairs, and long-term solutions, bridging the gap between simple repairs and emergency needs. Whether it's an urgent concern or preventive maintenance, choosing a trustworthy and experienced partner improves household safety and functionality.
Embrace these insights and tools - you'll find yourself not only smarter when it comes to repairing leaking faucets but also better equipped to maintain the long-term health of your home fixtures. Always remember, prevention is key, and professional support is just a call away when you need it most.
Categories
Recent Posts
-
August 17, 2026
Repair a Leaking Faucet in the Bathroom Step by Step
-
August 15, 2026
Carpets and Water Damage Restoration: What to Expect
-
August 9, 2026
Allergy Mold Count in Dayton and How It Affects Indoor Air Quality